
A great gift basket is hard to beat. A beautiful basket stuffed with tons of personalized goodies? Who wouldn’t love to be surprised with something like that? If you’re feeling ambitious this holiday season and you’re planning on building gift baskets for all your loved ones, well, we applaud you. And to help, the expert gift-giving curators here at Biggest Little Baskets in Reno, Nevada, are sharing our secrets for building a great gift basket in five easy steps. Bookmark this page and let’s go!
1. Consider your Audience
Step one is to think about your gift recipient. What do they love or appreciate? While gift baskets can be seasonal, they can really be anything at all. You could put together a themed gift basket for a child, a teen, an adult, or your 99-year-old grandmother. The trick is spending some time to really consider what would be meaningful and appreciated, so don’t rush this step!
2. Plan your Budget
It’s easy to go overboard when you’re stuffing a basket full of wonderful things, so do yourself a favor and make a budget ahead of time. That gives you the flexibility to mix and match inexpensive items with a few pricier standouts. Be mindful of shipping costs too, if these baskets are going to far-away recipients. An enormous basket will need an even bigger box and steep postage, so consider buying prepaid boxes and fitting your basket to that size!
3. Be Creative
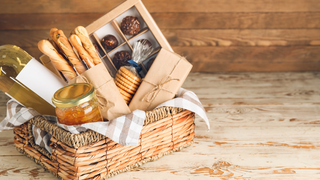
Sure, they’re called gift baskets, but you have options here. Part of the appeal of a great gift basket is the presentation, so feel free to go rogue. Wooden crates, wire containers, a beautiful charcuterie board, even a Christmas stocking or reusable tote are all perfectly acceptable containers. They may even save you money so you can put more into the items inside, and they often tie into themes if that’s what you’re going for.
Your budget will help steer you in the right direction for an appropriately-sized container, too, so let that be your guide.
4. Choose & Arrange Your Items
This is the fun part! The assortment of gifts in the gift basket means you aren’t pressured to find that single perfect item, so it’s a lot easier to feel creative. Start by laying out all the items you’ve purchased (or made, for all you crafty types!). A great filler is the secret to a full gift basket, so look for natural shreds or something that will give your basket structure and support all the goodies you’re putting inside. You want to use enough filler so that the gifts inside are visible over the top of the container.
Next, decide which side of the basket will be the front. Then, start arranging the biggest items at the back. Medium-size gifts go in the middle and smaller ones go to the front and can help fill any gaps. The idea is to make it feel as full as possible, and small tasty treats go a long way. Feel free to wrap a gift or two if you like the element of surprise!
5. Finish it Off
Traditionally, gift baskets are wrapped in clear cellophane to help keep everything securely in place. It also lets your recipient see everything before they even open it, which only adds to the excitement. You can also dress it up with a beautiful bow or seasonal accent to really take the thoughtfulness up a notch. And that’s a wrap!
The Takeaway
If building an amazing gift basket sounds like a lot of work, you aren’t wrong. There’s a lot of time and effort and intention that goes into building something thoughtful, and it’s important to know that going into it! If you love the finished product but you’re reconsidering your ability or desire to actually do it yourself, well, that’s where Biggest Little Baskets come in. We’ll do the work, you get the credit. It’s as simple as that!